8. Using TinyMCE templates
TinyMCE has a templates plugin which provides an easy way to create complex content in TinyMCE. You can use that to help users to add complex content structures like predefined tables or content. The users then only need to customize this content to their needs.
Create your own TinyMCE templates
We already have a folder named tinymce-templates in our theme folder. So we just need to add a file named content-box.html into the this folder:
maik@planetmobile:~/develop/plone/plonetheme.tango/src/plonetheme/tango/theme
$ tree tinymce-templates/
tinymce-templates/
└── content-box.html
In the file content-box.html we put this HTML template content:
<div class="mceTmpl">
    <div class="row">
        <div class="box">
            <div class="col-lg-12">
                <hr>
                <h2 class="intro-text text-center">Build a website
                    <strong>worth visiting</strong>
                </h2>
                <hr>
                <hr class="visible-xs">
                <p>The boxes used in this template are nested between a normal Bootstrap row and the start of your column layout. The boxes will be full-width boxes, so if you want to make them smaller then you will need to customize.</p>
                <p>A huge thanks to <a href="http://join.deathtothestockphoto.com/" target="_blank">Death to the Stock Photo</a> for allowing us to use the beautiful photos that make this template really come to life. When using this template, make sure your photos are decent. Also make sure that the file size on your photos is kept to a minumum to keep load times to a minimum.</p>
                <p>Lorem ipsum dolor sit amet, consectetur adipiscing elit. Nunc placerat diam quis nisl vestibulum dignissim. In hac habitasse platea dictumst. Interdum et malesuada fames ac ante ipsum primis in faucibus. Pellentesque habitant morbi tristique senectus et netus et malesuada fames ac turpis egestas.</p>
            </div>
        </div>
    </div>
</div>
This is the template content we will get in TinyMCE when we use this template.
Activate TinyMCE templates plugin
Note
The activation of the TinyMCE template plugin is already provided by bobtemplates.plone, the only thing you have to do is to add your template tothe registry, like described below.
If the -plugin is not already activated, you can activate the template plugin (the custom_plugins record) and register this template for TinyMCE (the template record):
<?xml version="1.0"?>
<registry>
  <!-- register our template -->
  <record name="plone.templates" interface="Products.CMFPlone.interfaces.controlpanel.ITinyMCESchema" field="templates">
    <field type="plone.registry.field.Text">
      <default></default>
      <description xmlns:ns0="http://xml.zope.org/namespaces/i18n" ns0:domain="plone" ns0:translate="help_tinymce_templates">Enter the list of templates in json format                 http://www.tinymce.com/wiki.php/Plugin:template</description>
      <required>False</required>
      <title xmlns:ns0="http://xml.zope.org/namespaces/i18n" ns0:domain="plone" ns0:translate="label_tinymce_templates">Templates</title>
    </field>
    <value>[
      {"title": "Image Grid 2x2", "url": "++theme++tango/tinymce-templates/image-grid-2x2.html"},
      {"title": "Content box", "url": "++theme++tango/tinymce-templates/content-box.html"}
      ]
    </value>
  </record>

  <!-- activate the plugin -->
  <record name="plone.custom_plugins" interface="Products.CMFPlone.interfaces.controlpanel.ITinyMCESchema" field="custom_plugins">
      <field type="plone.registry.field.List">
        <default/>
        <description xmlns:ns0="http://xml.zope.org/namespaces/i18n" ns0:domain="plone" ns0:translate="">Enter a list of custom plugins which will be loaded in the editor. Format is pluginname|location, one per line.</description>
        <required>False</required>
        <title xmlns:ns0="http://xml.zope.org/namespaces/i18n" ns0:domain="plone" ns0:translate="">Custom plugins</title>
        <value_type type="plone.registry.field.TextLine"/>
      </field>
      <value>
        <element>template|+plone+static/components/tinymce-builded/js/tinymce/plugins/template</element>
      </value>
  </record>
</registry>
As we already have the configuration already in place and even a TinyMCE template already exists, we only need to extend the following list with our template file.
<value>[
 {"title": "Image Grid 2x2", "url": "++theme++tango/tinymce-templates/image-grid-2x2.html"},
 {"title": "Content box", "url": "++theme++plonetheme.tango/tinymce-templates/content-box.html"}
 ]
</value>
Note
Now you need to uninstall/install (or import the registry profile from portal_setup) your package to update the registry configuration.
You can also add the template TTW in the TinyMCE control panel by updating the following snippet:
[
  {
   "title": "Image Grid 2x2",
   "url": "++theme++tango/tinymce-templates/image-grid-2x2.html"
  },
  {
   "title": "Content box",
   "url": "++theme++plonetheme.tango/tinymce-templates/content-box.html"
  }
]
Note
Just remember to activate the plugin from the toolbar/plugins tab.
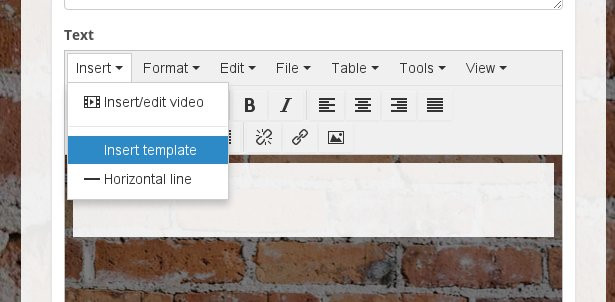
Use TinyMCE templates for content creation
We can add template-based content from the Insert menu > Insert template:
Now we can choose one of the existing TinyMCE templates:

After we have chosen our template and then clicked on OK, we have our template-based content in the editor:

We can now customize it or use more templates to create more content.